
“Intro to Eclipse” Exercises
Exercise #5: Importing an Archived Project
Visit the following URL: http://www.cse.yorku.ca/course/1710/pub/
Your will see a file listing containing Week01.zip. Download the file called Week01.zip to the default location by double-clicking on it.
When using Explorer, be sure to select "Save" and NOT "Open". (If you select Open, then Windows will unarchive the file, but we want Eclipse to do the unarchiving).
The default download location for Eclipse and Explorer is C:\Documents and Settings\cseXXXXX\My Documents\Downloads. The location of the downloaded file is not a major concern and the download can go pretty well anywhere*
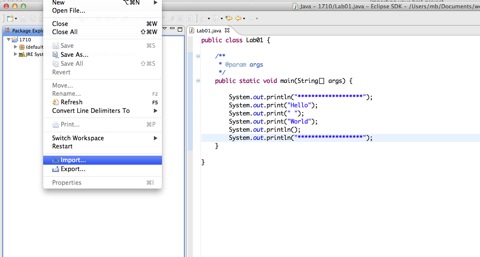
In Eclipse, select File → Import. This will bring up the "Import" dialog box. This is shown on the next two screen shots.
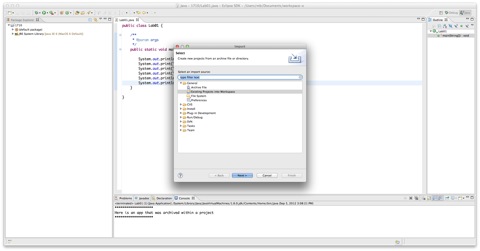
Select the item "Existing Projects into Workspace" under the "General" category. Press the "Next >" button.
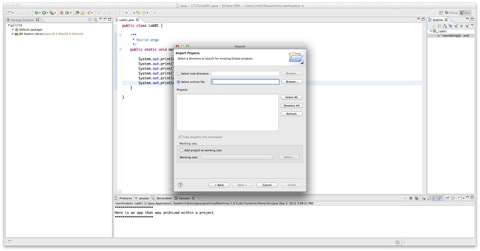
Select the "Select archive file:" option. DO NOT select the "Select root directory" option. Press the "Browse" button that is next to the "Select archive file:" option. You will be presented with a file chooser. Using the file chooser, navigate to the default download location (or wherever you downloaded the file in Step 1)
Select the project archive file that you downloaded in the step above.
Click "Finish"
You will now see the following:
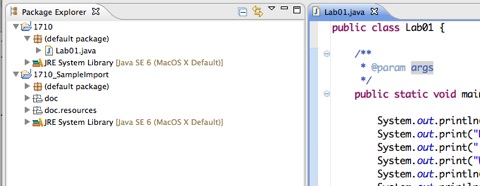
Congratulations. You imported a project into Eclipse, the files were extracted from the archive by Eclipse and placed in the correct location.
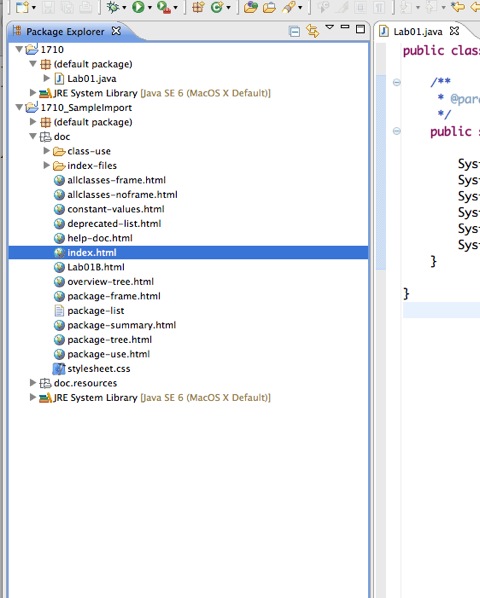
Have a look at this app's documentation by opening its API (double-click on index.html).
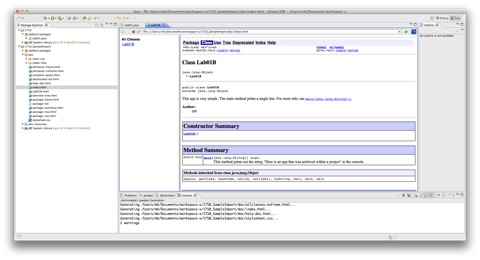
Now follow this link:

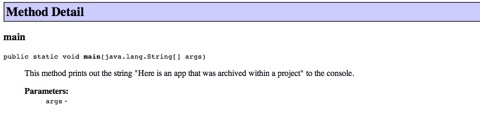
This is the documentation for the main method:
Run the app Lab01B to see the output. Does the program behaviour match its specified behaviour? This question is the core issue for the concept of program correctness. We will cover this concept in more detail during the course.
*to be precise, the location can be anywhere EXCEPT Z:\workspace-win32\1710\, but the download will not go there unless you specify it.