CSE1020 Guided Tour Part 2: jEdit and Java
Using jEdit
Every Java program that your write in CSE1020 requires you to create one file that contains the source code for the program. You create the source code file using a program called an editor. The editor that we recommend is called jEdit.
jEdit is itself written in Java. It is freely available for Linux, Windows, and Mac OS.
Those of you who have previously programmed in Java probably used an integrated development environment (IDE) such as Bluej, Eclipse, or NetBeans.
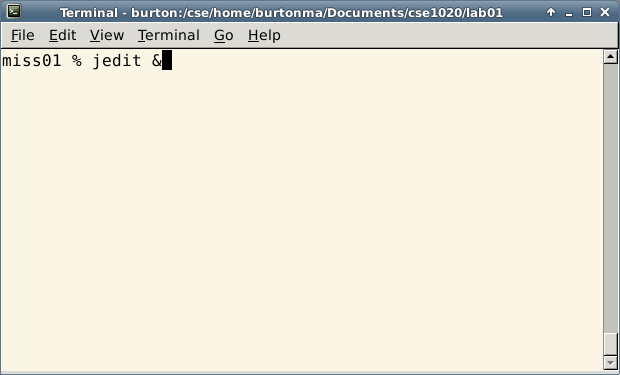
Make sure that you are in your cse1020/lab01 directory. Start jEdit from the terminal using the command shown to the right.
You can also start jEdit from the menu CSE Menu > Development > jEdit
You should see two new windows appear when jEdit starts. Close the jEdit Help window.
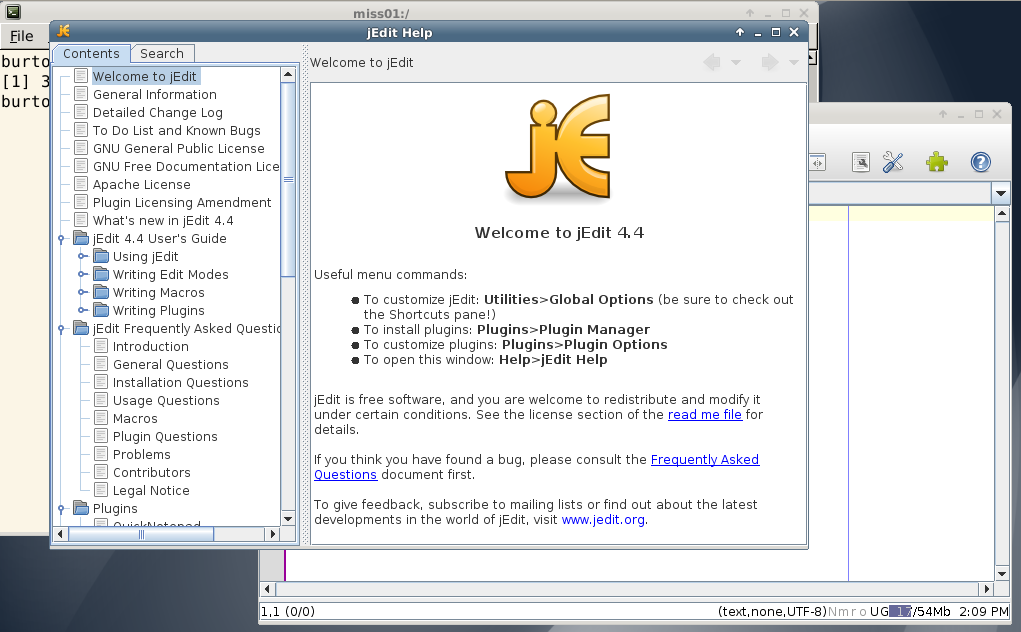
You should be left with the jEdit editor window. The editor is basically a text editor (like Windows Notepad) that has some features that are useful for writing source code.
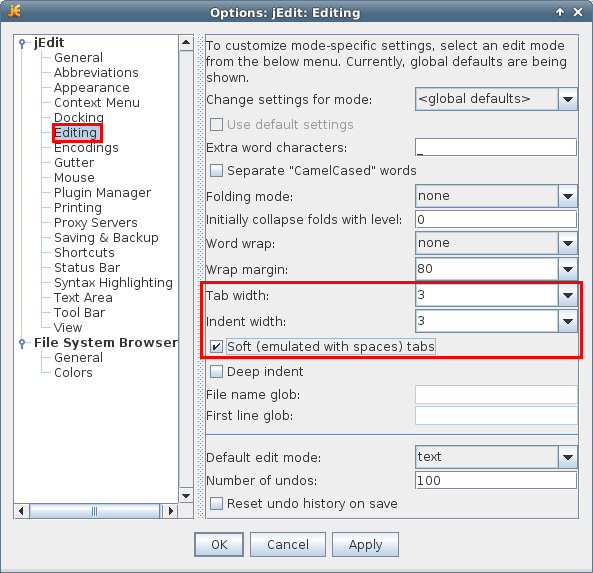
We need to configure jEdit to enable some useful features and to help you write code that conforms to our coding standards. Start by accessing the menu item Utilities > Global Options...

We need to configure jEdit to enable some useful features and to help you write code that conforms to our coding standards. Start by accessing the menu item Utilities > Global Options...
In the left panel, make sure that you have the Editing option selected (outlined in red).
In the right panel, change the 3 settings outlined in red to the values shown.
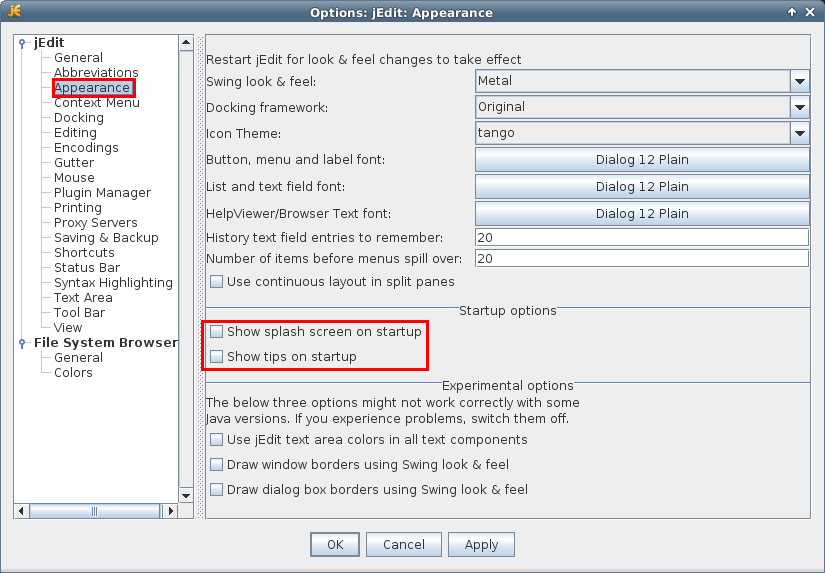
In the left panel, make sure that you have the Appearance option selected (outlined in red).
In the right panel, change the 2 settings outlined in red to the values shown.
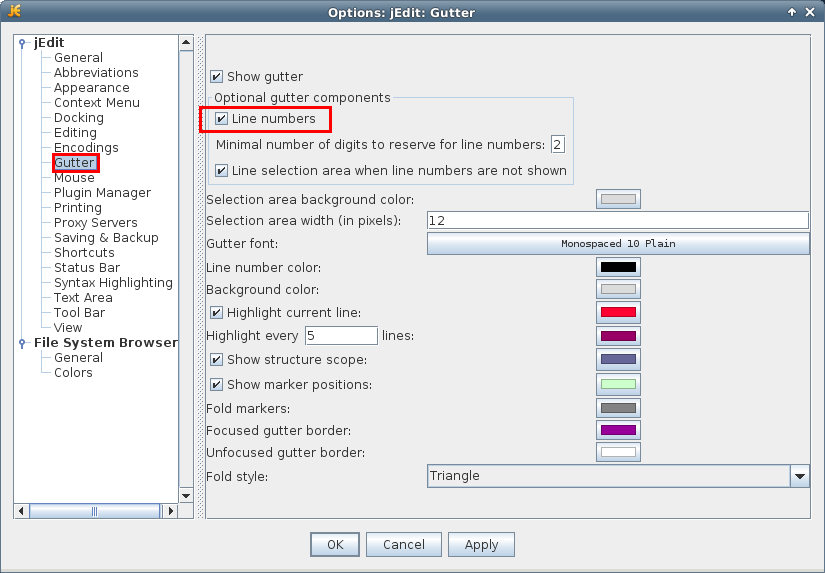
In the left panel, make sure that you have the Gutter option selected (outlined in red).
In the right panel, change the 1 setting outlined in red to the value shown.
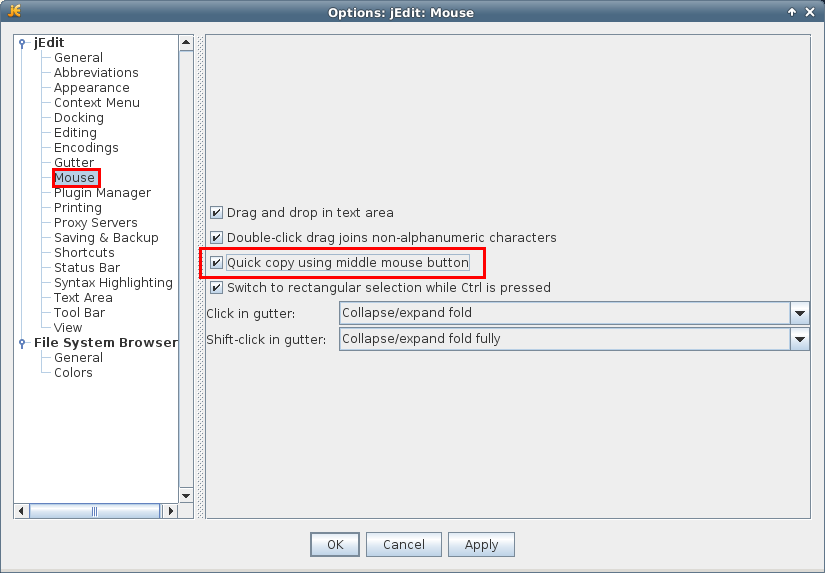
In the left panel, make sure that you have the Mouse option selected (outlined in red).
In the right panel, change the 1 setting outlined in red to the value shown.
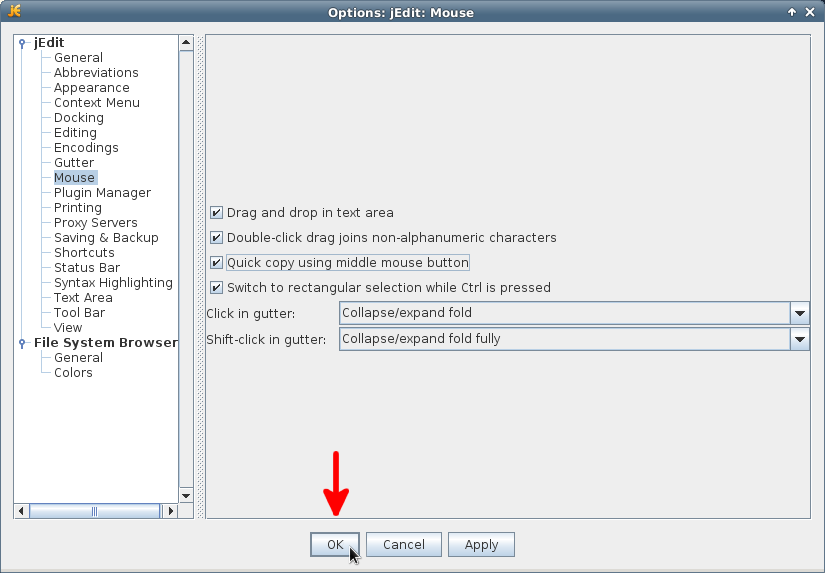
Now press the Ok button.
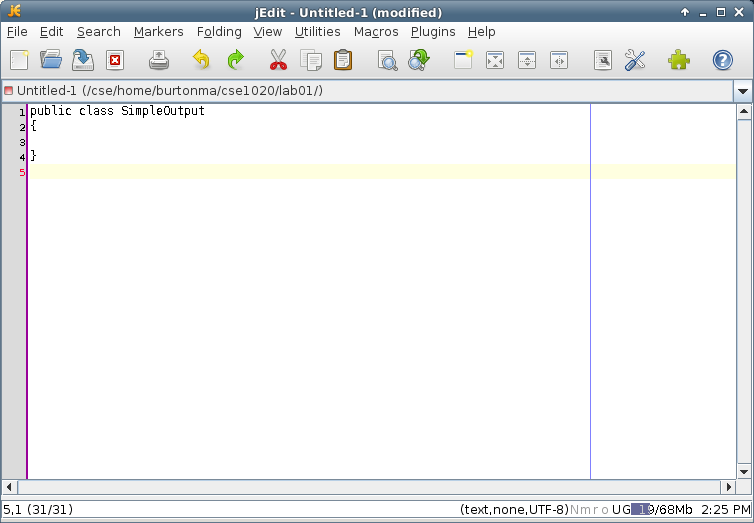
You will now create your first Java program. Type the text shown below into the editor. Pay careful attention to make sure that the text you enter is exactly the same as what is shown (upper case and lower case matters!).
A Java program is made up of one or more classes. A large program may have thousands of classes, but all CSE1020 programs that you will write will require you to write only one class (which will use classes written by other people).
The line public class SimpleOutput is called the class header. This particular header says that we are defining a class named SimpleOutput.
The opening brace { indicates the start of the class body, and the closing brace } indicates the end of the class body.
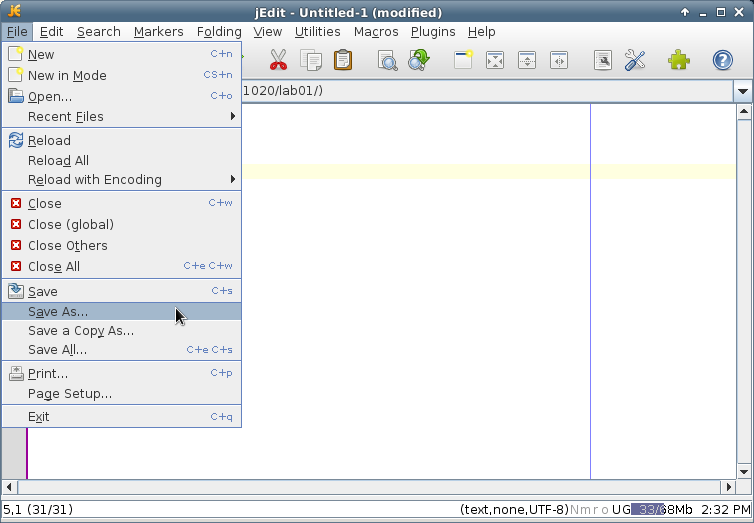
A good habit to develop is to frequenty save your work. Save your newly created class source code using the File > Save As... menu item. Go to the next step to see what you should name your file.
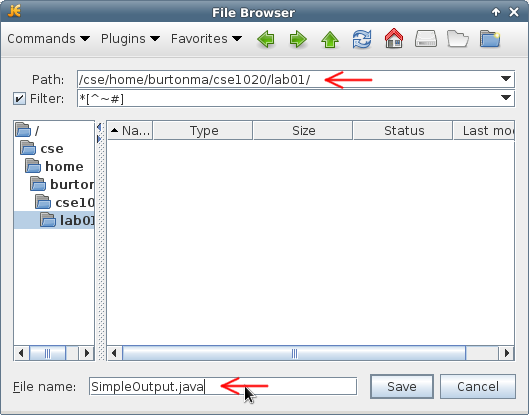
An important rule to remember is that Java expects the filename of a class to be the class name followed by .java
This rule means that you must save your file using the name SimpleOutput.java (see red arrow at bottom of figure below).
Make sure that you are saving the file in your cse1020/lab01 directory (see red arrow at top of figure below).
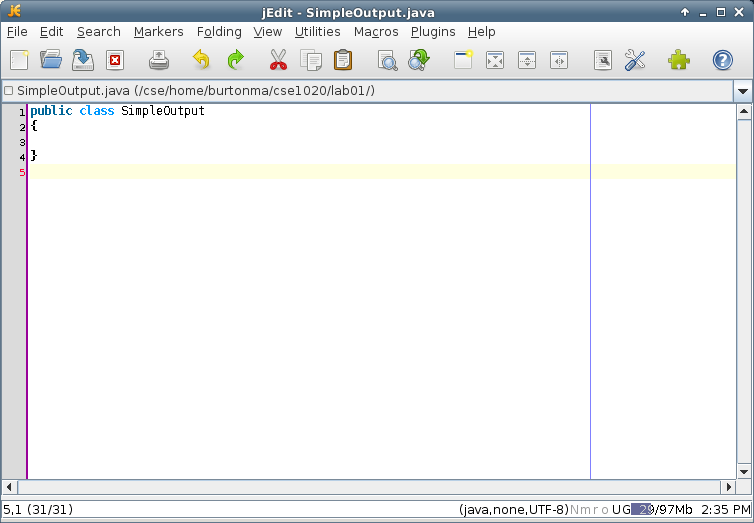
After you have saved your file as a Java source code file, jEdit is able to use colors to highlight your code. In this case, jEdit recognizes the words public and class as being Java keywords, and it colors them accordingly.
At this point, all we have is a Java source code file; the source code is a human readable representation of your program. To create a program that the user can run, you must convert your source code into a set of instructions called bytecode that the Java Virtual Machine can follow. This process is called compiling.
To compile your source code you use a terminal to invoke the Java compiler program javac

If you have done everything correctly so far, your program will have compiled successfully. If javac produced some error messages then you have done something incorrectly. You must fix any errors that have occurred before you can proceed; feel free to ask a teaching assistant for help.
Now that you have successfully compiled your program, you can try running your program using the the Java application launcher program java
Type the command java SimpleOutput into your terminal and press Enter. You should receive an error message.
This error message is an example of a run-time error. A program with a runtime error is written in valid Java (so it compiles successfully), but something is wrong with the logic of the program that causes an error when the program is run.
When you encounter a run-time error, your job as a programmer is to find the cause of the error and then correct the error(s) in your program; the process of correcting programming errors is called debugging.
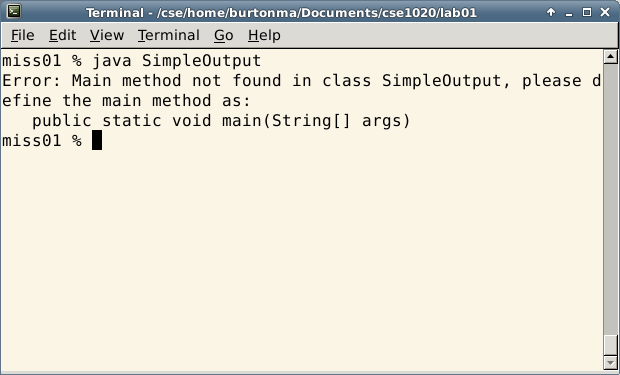
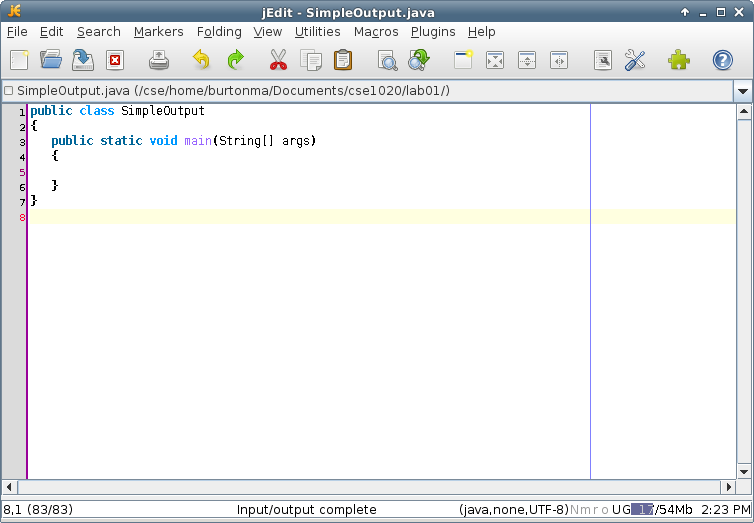
Every Java application must contain something called a main method; this is the starting point from which your application is run.
Add a main method to your program as shown below; the precise meaning of the individual words will be explained in class.
Notice that the main method has a pair of matched braces { } which indicates the body of the method. Also notice that the body of the main method is contained entirely within the body of the class.
Save your work.
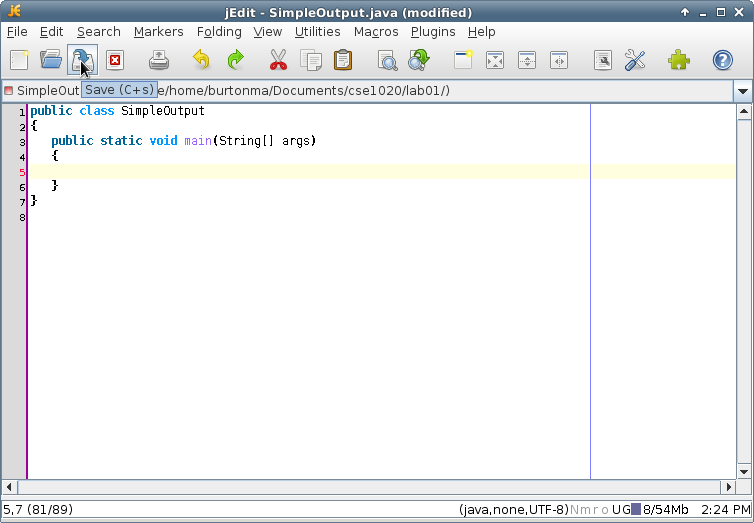
Your program has changed since you last compiled it. You must compile your program again to incorporate the changes.

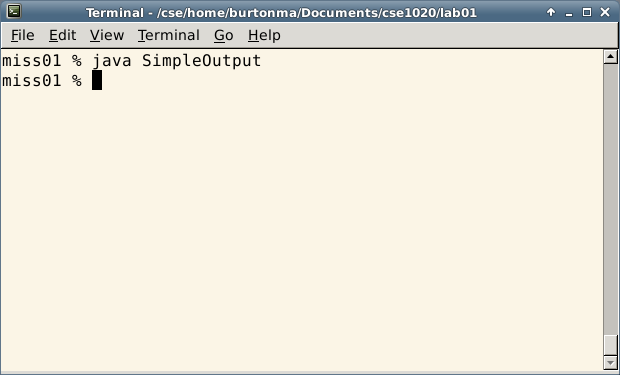
If you have done everything correctly so far, your program will have compiled successfully. If javac produced some error messages then you have done something incorrectly. You must fix any errors that have occurred before you can proceed; feel free to ask a teaching assistant for help.
Once your program successfully compiles, you can run your program. Not surprisingly, your program outputs nothing as your main method is empty.
Traditionally, the first program one writes when learning a new programming language is a program that prints Hello, world. Add two lines to your main method body as shown below, and save your program.
In plain English, the two lines of code in the main method mean:
- output refers to something (an object) that can print text to your terminal
- tell the output object to print Hello, world on one line of the terminal and then go to the next line
The technical meaning of the two lines of code will be discussed in class.
Your program has changed since you last compiled it. You must compile your program again to incorporate the changes.
Notice that you get an error when you try to compile your program. This kind of error is called a compile-time error and it is an indication that something is wrong with the syntax of your program (i.e., something that you have written is not valid Java).
When you encounter a compile-time error, you need to debug your program.
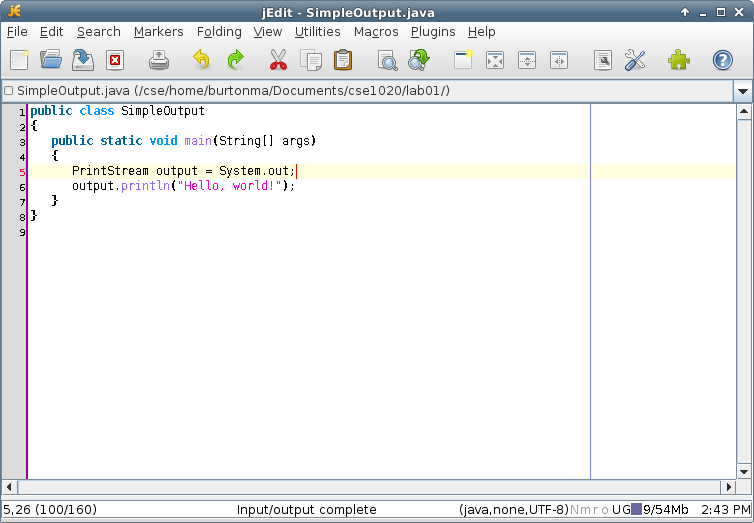
The first thing you should do is to carefully inspect the error message output by the compiler. In this case the error message informs you that there is in an error in the file SimpleOutput.java on line 5, and that the error has something to do with the PrintStream class.
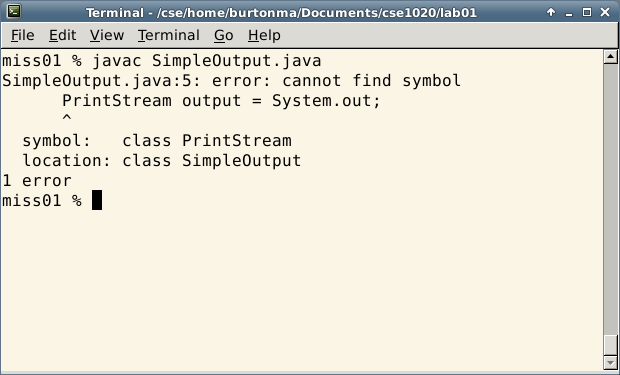
The error in this case is that our program is using a PrintStream class, but we have not specified which PrintStream to use.
The Java standard library has a large number of classes, many of which share the same name. Java organizes classes into groups called packages; if you want to use a class in a package, your program must import the class using the package name.
Correct your program by adding the appropriate import statement as shown below, and save your changes.

Your program has changed since you last compiled it. You must compile your program again to incorporate the changes.
Again, if you get compilation errors then you've done something wrong; check your work carefully, re-save, and re-compile until your program compiles successfully.
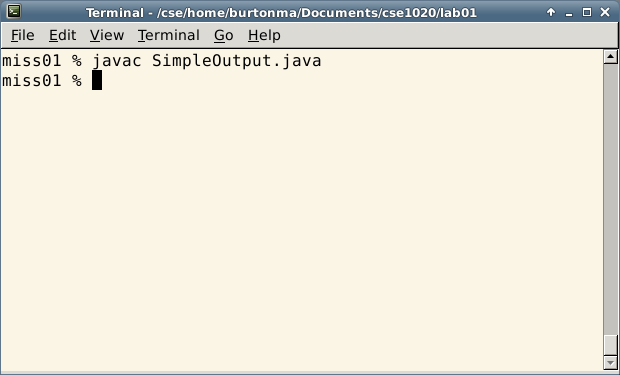
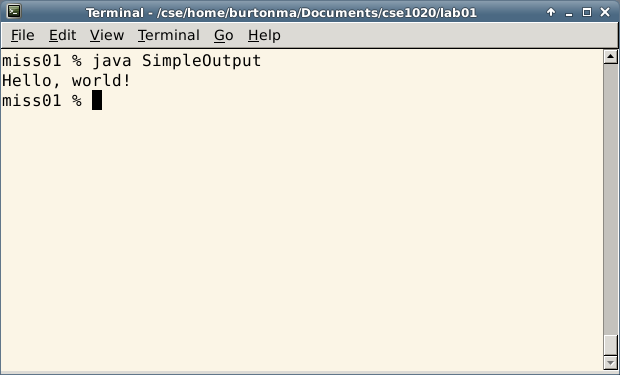
Once your program successfully compiles, you can run your program.
Summary
- A Java program is made up of one or more source code files.
- A source code file is written in human readable Java.
- Each source code file defines a class*.
- A class has a name that begins with a capital letter.
- A class named Classname must be saved in a file named Classname.java
- Source code must be converted to a computer usable representation using a compiler.
- Every time you modify a source code file, you must re-compile.
- Programming in Java is a cyclical process of editing source code, compiling source code, running the compiled application, and debugging.
- Save your source code often!
- Compile often!
| Command | Meaning |
| jedit & | Start the jEdit editor. |
| javac Classname.java | Compile the Java source code file for the class named Classname. |
| java Classname | Run the Java application named Classname. |