Web Computing
Search & Rescue
Version 0.1
 . Copyright ? 2015 by:
m Jenkin + h Roumani
Table
of Contents
1. Introduction 3
2. Background 5
2.1 HTML 5
2.2 CSS 7
2.3 The Simulation Logic 8
2.4 Drawing Shapes 9
3. Exercises 11
A. Pre-lab 11
B. In-lab 12
C. Advanced 13
4. Further Reading 15
5.
Credits
16
In
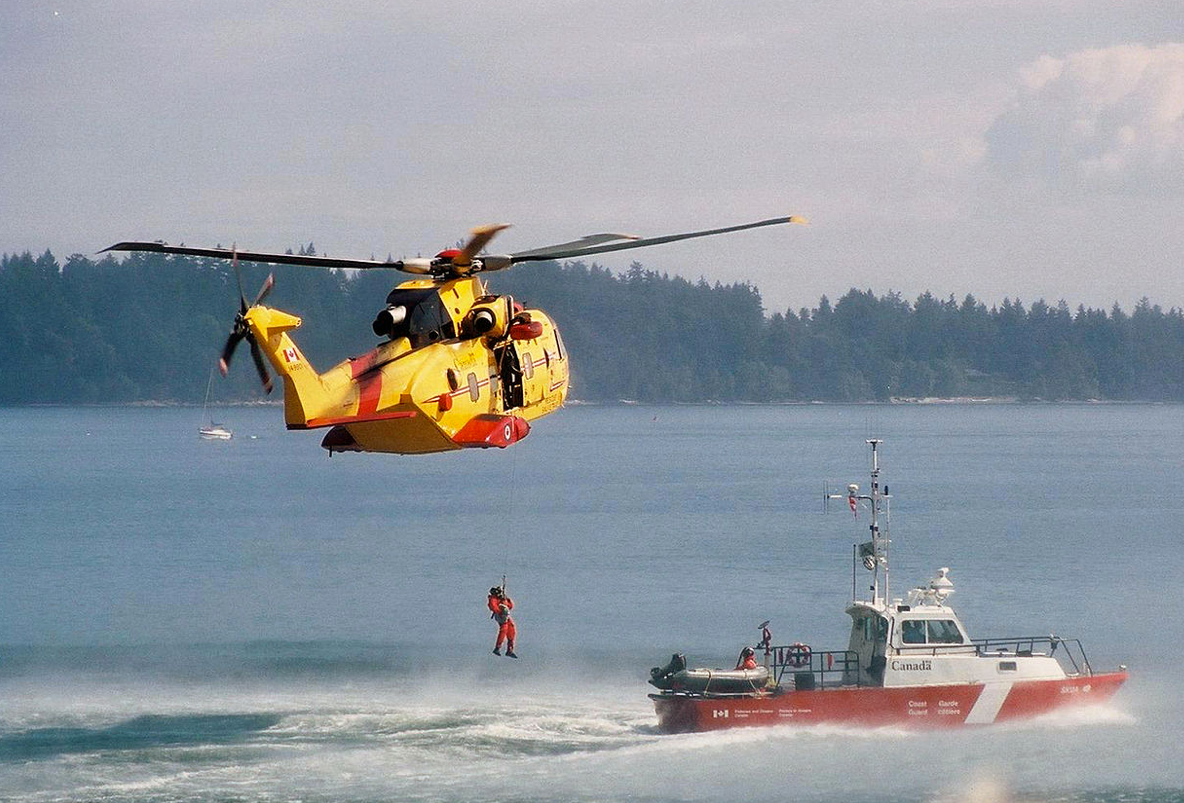
this lab we create a search and rescue simulation. We imagine a scenario in
which a ship has sent an emergency distress signal when it lost power and its
engines stopped. The rescue operation involves scanning the search area in
order to find the target ship as quickly as possible. The rescue vessel has a
radar that can detect the target ship when in range. Here is an example of the
simulation:
In
the above example, the rescue vessel always follows straight paths, and when it
reaches any of the four boundaries of the search area, it turns around in a way
similar to a light ray reflecting off a surface; i.e. it bounces. But as you
can imagine, there are many other strategies to scan the search area, and what
we seek is to do is to build an infrastructure that allows one to test various
algorithms and explore alternatives. Once built, this infrastructure can also
enable us to test other ideas, such as using two rescue vessels or allowing the
target ship to drift.
As
with all labs, each lab is laid out as an ePub. It is expected that you will
have read the lab electronic book prior to attending the lab. In order to
encourage this, each lab has an associated set of ?/span>pre lab?assignments
that must be completed prior to attending the lab. The lab monitor will not
allow you to participate in the lab if you cannot demonstrate that you have
completed the pre-lab assignment prior to attending the lab itself. Exercises
in the lab are to be documented in your ePortfolio lab book.
Creating
the simulation for this lab involves building an interface with HTML,
formatting it using CSS, and implementing the logic through Javascript. In this
section we highlight the key features needed from each of these
technologies.
You
may want to skim through the background material in your first review of this
lab. After wards, go to the actual exercises associated with the lab and then
refer back to the material presented here as needed.
The
UI (User Interface) in our simulation looks like this:
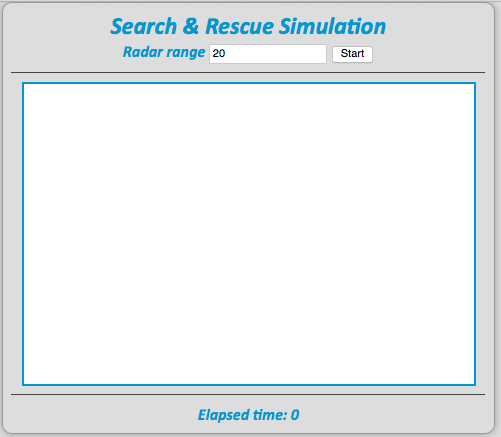
We
can recognize three different sections in the UI:
1.
The top part contains a title and an interactive section that
allows the user to enter the radar range of the rescue vessel (in pixels) and
then click the Start button to start the simulation. They HTML tags needed to
build this section are:
<h2>Search & Rescue Simulation</h2>
<label>Radar range</label>
<input value="20" type="text" />
<button onclick="start();">Start</button>
<hr />
2.
The middle part contains a canvas that renders the search
area, draws the target and rescue vessels in it, and animates the movement of
the rescue ship. We achieve this in HTML as follows:
<canvas width="450" height="300"></canvas>
<hr />
Notice that the indicated width and heights are merely
defaults. The user will be prompted to optionally change them once the
simulation starts.
3.
The bottom part is informational in nature. It lets the user
monitor the progress of the simulation. Something like this:
<label>Elapsed time:</label>
<span>0</span>
The tags discussed above will create the needed UI but we need to
be able to interact with them dynamically. For example, we must be able to read
what the user entered for the radar range; we need to change the value of the
elapsed time; and we need to detect that the user has clicked the button. These
tags must therefore be tagged (using IDs and classes) so that Javascript and
CSS can refer to them. This leads to this revised HTML content:
<h2 class="center">Search & Rescue Simulation</h2>
<div class="center">
<label>Radar range</label>
<input id="radar" value="20" type="text" />
<button onclick="start();">Start</button>
</div>
<hr />
<canvas id="searchArea" width="450" height="300"></canvas>
<hr />
<div class="center">
<label>Elapsed time:</label>
<span id="elapsed" class="progress">0</span>
</div>
Examine
the revision and note the added div tags that allows us to
divide the HTML document into logical parts and apply tagging and formatting on
each.
In
order to format the UI the way we want, we apply style rules at the tag, ID, or
class level. For example, in order to centre contents, we surround it by a div, assign that div a class, and apply the
following rule to all members of that class:
.center
{
margin: auto;
text-align:
center;
display: block;
}
The remaining formats can be implemented
using this stylesheet:
@CHARSET "UTF-8";
body
{
width:475px;;
margin:auto;
background-color: #dddddd;
font-family: Calibri, Ariel, sans-serif;
font-size:
16px;
font-style:
italic;
font-weight: bold;
color: #09C;
border-radius: 10px;
padding: 8px;
border: 1px solid #999;
box-shadow: 0px 0px 8px rgba(0, 0, 0, 0.3);
}
.center
{
margin: auto;
text-align:
center;
display: block;
}
#searchArea
{
border: 2px solid #09c;
background-color: #ffffff;
margin: auto;
display: block;
}
The
simulation produces a series of frames each of which captures the status at a
given instant of time. To create a new frame, the program must perform the
following operations:
1.
Erase the content of the previous frame.
2.
Draw the assets of the current frame. This involves drawing
two icons (representing the target and rescue vessels) at their correct
positions.
3.
Update the bottom part of the UI so that the user is informed
about progress.
4.
Determine if the target is within reach, i.e. that this
distance between the two ships is within the radar range. If so, this would be
the simulation must stop.
5.
If however the target is out of reach, then the position of
the rescue ship must be advanced to simulate its movement. This depends on
whether it is within the search area (in which case it continues in a straight
line) or is at a boundary of the search area (in which case it must bounce
back).
These
steps are captured by the following logic:
function simulate()
{
clear();
drawTarget();
drawRescue();
updateProgress();
if (found())
{
clearInterval(intervalID);
}
else
{
if (xBoundary()) direction.dx = -direction.dx;
if (yBoundary()) direction.dy = -direction.dy;
rescue.x
+= direction.dx;
rescue.y
+= direction.dy;
}
}
Each time the
simulate
function is called, a new frame appears on the screen, so if we call this
function repeatedly, the objects in the frame will appear to be moving. This is known as
animation and
the frequency of the calls (i.e. how many times you call simulate or, reciprocally, how long you wait in
between calls) determines the speed at which the objects appear to be moving. We do this in Javascript
using the
setInterval
function. For example, the statement:
setInterval(simulate, 15);
will cause the simulate function to be called every 15 milliseconds.
2.4 Drawing Shapes
It is
very easy to draw shapes on a canvas because the process resembles how we,
humans, draw. Rather than filling a raster of pixels, we simply trace lines.
Given the graphic context of the canvas, you start your drawing by the
statement:
context.beginPath();
Then,
determine the shape (rectangle or arc) that you like to draw, e.g.
context.rect(x, y, width, height);
This
will draw a rectangle with upper-left corner at (x,y) and with the specified
dimension. Recall that the canvas coordinate system has the x-axis pointing to
the right and the y-axis pointing down, with the origin in the upper-left
corner of the canvas.
The
last step involves either tracing the shape (an outline) or filling it (solid),
e.g.
context.stroke();
The
full function that draws the taget, for example, can be constructed as follows:
function drawTarget()
{
context.beginPath();
context.lineWidth = "4";
context.strokeStyle
= "red";
context.rect(target.x, target.y,
TARGET_SIZE, TARGET_SIZE);
context.stroke();
}
As
with other labs in this course, lab exercises are broken down into three
sections, A, B and C. Exercises in section A are Pre-Lab exercises. All Pre-lab
exercises must be completed prior to
attending your lab. You will not be allowed to participate in the lab if you
have not completed these exercised prior to attending the lab. A backup lab is
scheduled each week for students who miss/were unprepared for their normal lab
time. You will also get much more
out of each laboratory if you spend some time going through the B and C
exercises for each laboratory before attending your laboratory session.
1. Download the zipped
project EECS1012Lab2.zip from the JR web site. The process is the same as
in previous labs:
a)
Launch the Firefox browser of your VBox and visit the JR site. Click the code icon
next to Lab #2 to see the available files. Click the file named EECS1012Lab2.zip and have the
browser open it using the archive manager. This will unzip the file and open a
new window. Click the extract button at the top of that window and then click
the workspace folder to indicate that the extract target
location should be /home/user/workspace.
b) Launch Eclipse and choose Import?/span> from the File menu. Select Existing Projects into
Workspace in
the General and click Next >. In the Import window, click the Browse?/span> button and select the file we have
just downloaded and unzipped into the workspace. Click Finish.
2.
If for some reason you don?/span>t have VBox set up on your
home machine, or if the above process failed, you can download the needed files
individually from the JR site, store them in some
directory, and then open them with the editor of your choice.
3.
Examine the HTML and Javascript files and note the glue that
connects them together. In particular, answer the following questions:
1)1)
The HTML file refers to the CSS in its head. What tag is used
for that?
1)2)
The HTML file also refers to the Javascript file. What tag is
used for that?
1)3)
What controls the frame rate? In other words, once the first
frame in displayed, when will the second one be displayed?
1)4)
How is the position of the target determined?
1)5)
How does the direction variable controls the
movement of the rescue vessel? Note that it is assigned an initial value using
the JSON notation.
4.
Examine the CSS file and answer the following questions:
1)1)
What is the meaning of the border-radius style rule?
1)2)
The body selector contains a declaration that
assigns the auto value to the margin property. What does this rule do?
You can try removing it and then reloading the page in the browser.
1)3)
The body selector contains a declaration that
assigns 8px value to the padding property. Change this value to 20px and see what happens in
the browser as it re-renders the modified page.
1.
Obtain a laptop from the lab monitor (if you don?/span>t have yours), along with
video camera and tripod.
2.
Start VBox and launch Eclipse.
3.
Download this lab as explained in the Pre-Lab section.
4.
There seems to be a problem in how the rescue vessel detects
the boundaries. For example, it seems to slightly penetrate the right
edge of the search area before bouncing back! Determine which function is
responsible, why this is happening, and fix it. The same occurs at the bottom
edge.
5.
A more serious problem occurs at the left and top edges. In
them, the rescue ship keeps going as if the edge is not present. Again, determine
for each edge
which function is responsible, why this is happening, and fix it.
6.
The distance-to-target does not appear in the UI. This
informational piece must appear at the bottom of the UI as shown in the opening
video of this lab. You will need to revise the HTML file to include it and to
revise the Javascript file to update it as the simulation runs. Use Math.floor() to strip away the decimal
part of the computed distance.
7.
The found() function always returns false!
It is supposed to return true when the target is in range. Correct this mistake
and verify that the simulation actually ends when the two vessels are close
enough.
8.
The elapsed time and distance to target values must appear in
a distinctive colour. Put them both in the same class (progress) and then add a style rule
for this class in the CSS so that they appear bold and in a purple shade of
your choice. You can specify the shade by specifying its red, green, and blue
components.
9.
How can you make the animation faster? Modify the code so it
re-draws every 5 millisecond. Capture your simulation in your e-Portfolio.
10.
Comment out the clear() invocation from the simulate
function and re-run the simulation. Explain what you see and capture it in your
e-Portfolio.
1.
The user can override the default height when the simulation
starts by entering any desired value. This input, however, is not validated.
Add validation so that only a valid entry is accepted. To be valid, the entry
has to be positive but not greater than the width of the browser. If not,
simply ignore the entry and keep the default width. To that end, you may want
to use the window.innerWidth property of the window object.
2.
Add code to allow the user to also override the height of the
canvas.
3.
Modify the function that draws the target so that it looks
more like a ship. Perhaps a horizontal line and a semicircle below it. You may
want to use the moveTo and lineTo functions.
4.
Rather than taking the width (and height) inputs via dialogs,
can we do this through an HTML form; i.e. similar to how the radar range was
entered? If so, make the necessary changes.
?
Tutorials on web technologies.