EECS 4443 / EECS 5443 – Mobile User Interfaces
Winter 2022
Lab #5
Introduction
In this lab exercise, you will study and modify the Demo_Camera Android application. As with the earlier labs, you are asked to make changes to the demo program. One modification is to change the view of the camera images taken with this demo. The demo currently displays images in a one-dimensional list (usingListView). You will re-work the display to use a two-dimensional grid (usingGridView). You will also implement an Options Menu with an item to launch an e-mail intent to send a picture to a friend. Another change is to re-style the buttons to use images instead of text. Preparation:As with the other labs, you should treat this lab as an assignment. Try to finish the lab prior to the scheduled lab period. Debugging is time-consuming and the scheduled lab will be busy. The TA will work with all students, as time permits, checking work and helping with debugging.
- Previous labs – If you have not completed Lab #1 through to Lab #4, do so now before proceeding with this lab exercise.
- Demo_GridView, Demo_Buttons, and Demo_Ink – These demo programs were discussed and demonstrated during classroom lectures. Now it's your turn. Download the Demo_GridView, Demo_Buttons, and Demo_Ink project files and create the corresponding Android projects. Run the applications and observe their behaviour. As well, study the JavaDoc (API), the linked-to resources, the source Java code, and the comments within. Your are studying these particular demo programs because they include examples of the modifications required for this lab.
Objectives
Upon completing this lab, students will have the skills to do the following:
- Implement an Android application that launches a camera intent to take pictures or record videos.
- Implement an Android application that displays a collection of images in a one-dimentional or two-dimensional grid.
- Implement an Android application that launches an intent to send an image as an e-mail attachment.
- Implement an Android application that includes an Options Menu.
- Implement an Android application that responds to items that are clicked in an Options Menu.
- Implement an Android application that uses stylized buttons.
Task 1 – Load the “Demo_Camera” Project
Download the Demo_Camera project file and create an Android project in your workspace. Follow the same procedure as given in Lab #1, Task 2. Read the JavaDoc (API) for Demo_Camera, including the linked-to resources. There are five source files:Study the source code and related comments.
DemoCameraActivity.java– the main activity for the applicationImageAdapter.java– a bridge between aView(in this case, anImageView) and the data in the view.ImageDownloader.java– a helper class to download imagesImageListViewerActivity.java– an activity that displays a list of items (in this case, images)VideoViewerActivity.java– an activity that displays a video in aVideoView
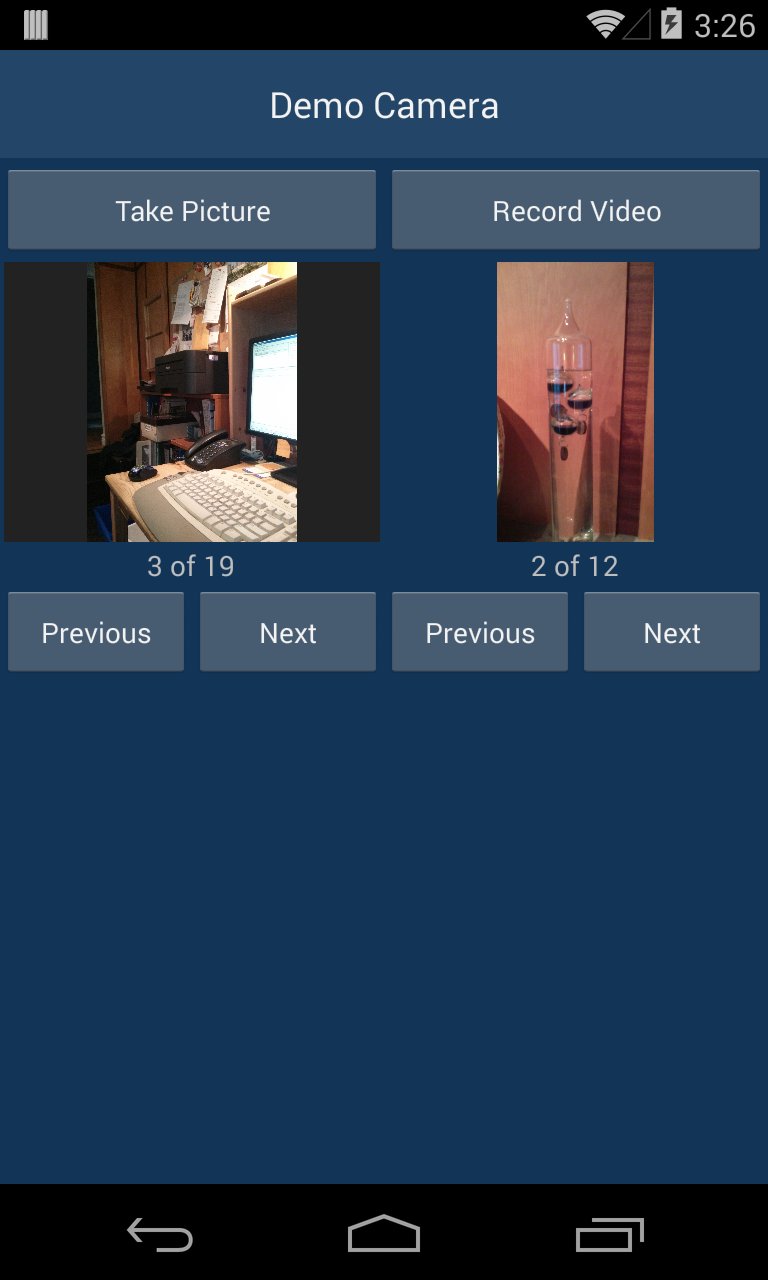
Task 2 – Run the Application
Run Demo_Camera. Follow the same procedure as given in Lab #1, Task 3. Observe the application's behaviour. Experiment with taking pictures and videos and then viewing the pictures and videos.
Task 3 – Personalize the Project
Make a personalized version of the Demo_Camera project. Follow the same procedure as given in Lab #1, Task 4. All modifications (see next Task) are to be made in the new personalized version of the project, not in Demo_Camera.
Task 4 – Modify, Debug
Make the following changes to the modified project. As with Lab #1, please document your changes via source-code comments. Indicate what you did, and why you did it.
- Image Buttons. One of the Android Design Principles states that "Real objects are more fun than buttons and menus". Let's work on this. The main application activity includes six buttons. There is a button to launch an intent to take a picture ("Take Picture") and another to launch an intent to record a video ("Record Video"). Then, there are two buttons each to move forward and backward through the collection of pictures and videos ("Next", "Previous"). Redesign the UI to stylize these buttons using "real objects" – actually, images of real objects – instead of text. Here's an example:
This is just an example. Feel free to use your own design ideas. The use of an image button was demonstrated in an earlier demo, Demo_Buttons. Consult Demo_Buttons and its API for related details and discussion. 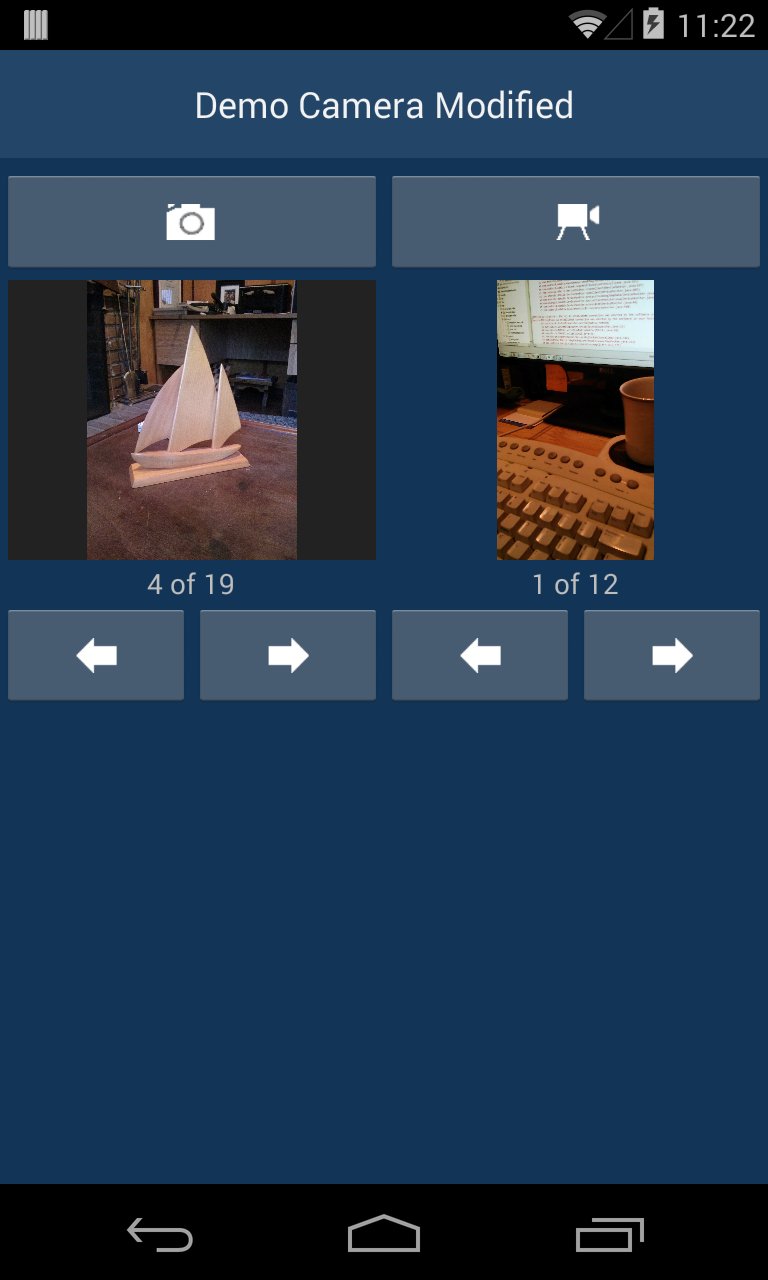
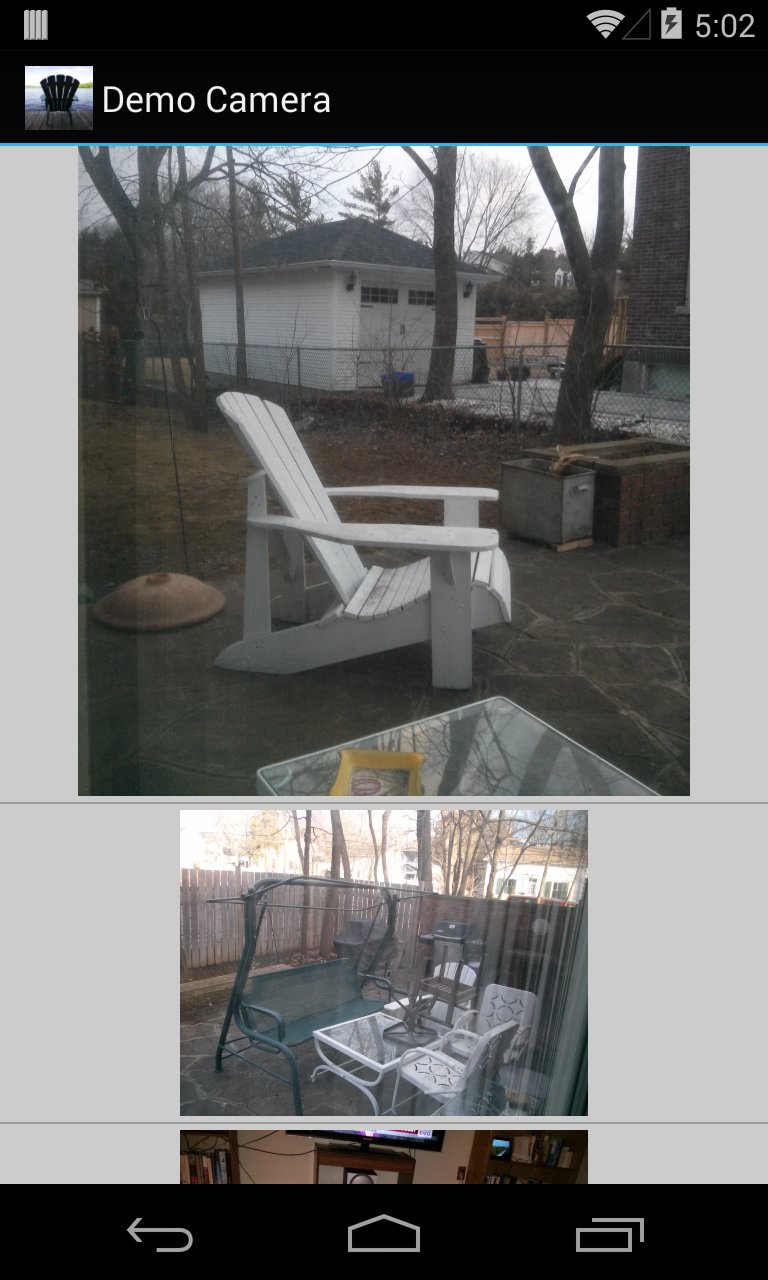
- GridView. What do you think of the use of a
ListViewto display the images (pictures)? Hmm... not so much. Let's work on this. Modify the application to display images in a 2D grid, rather than a 1D list. Tapping the image thumbnail in the first activity will have the following effect (approximately, this is just an example):For this modification, you can borrow resources from the Demo_GridView project, including the activity that displays the grid ( 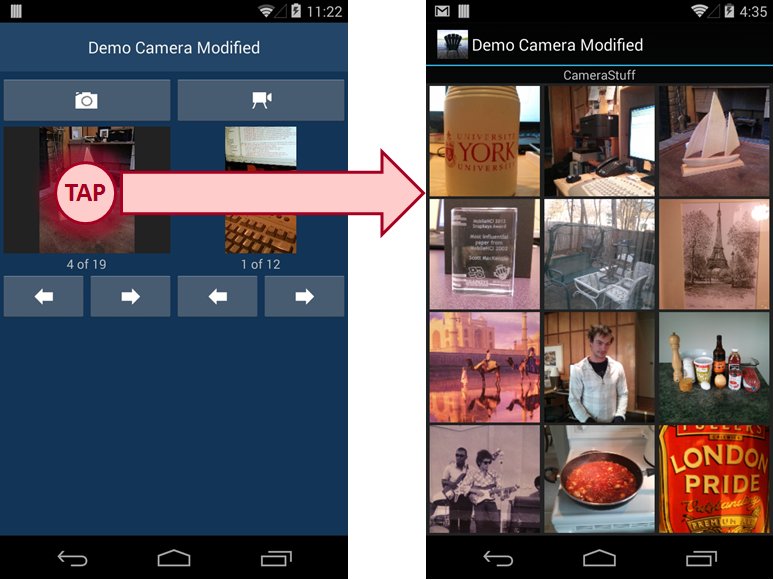
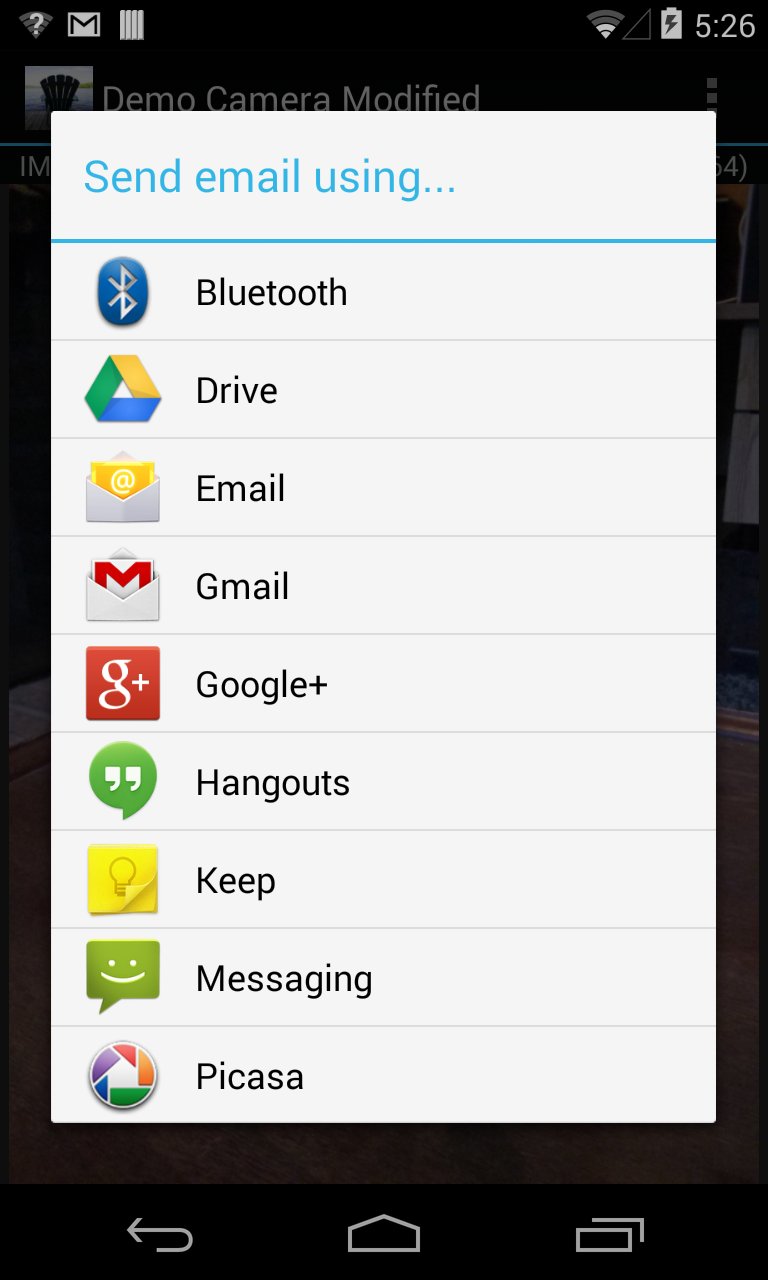
DirectoryContentsActivity) and the activity that displays individual images within the grid (ImageViewerActivity).- E-mail a Picture. Did you get some nice pictures while experimenting with this demo application? Hopefully, yes. It would be nice to send a picture to a friend using e-mail. Let's work on this. Add an Options Menu to the Action Bar in the
ImageViewerActivity. Add a "Send" item to Options Menu (below, left). When the Send item is clicked, launch an e-mail intent to send the picture to a friend (below, right).See Creating an Options Menu in the Android API Guides for Menus for implementation details. Details are also found in Demo_Settings and Demo_LunarLanderPlus (next lab). These demos include an Options Menu. Launching an e-mail intent was demonstrated in an earlier demo, Demo_Ink. Consult Demo_Ink and its API for related details and discussion. 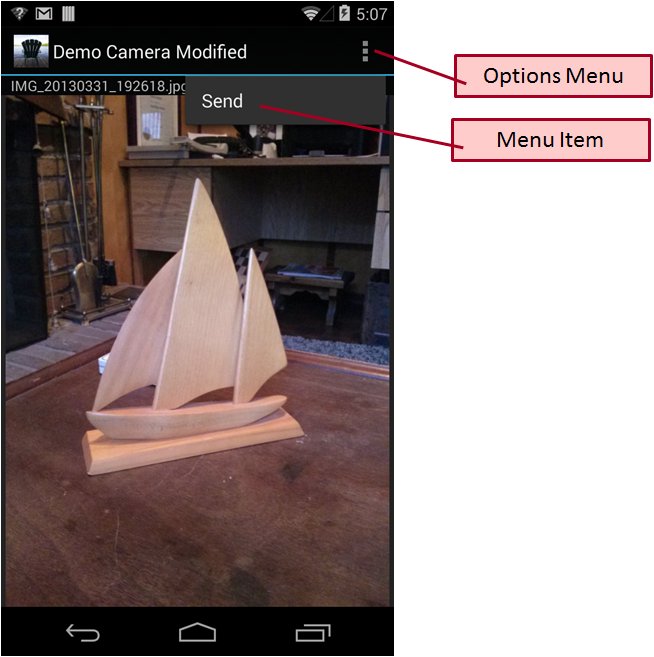
- Original Feature. Add a new feature of your own design. This requirement is open-ended: It's up to you! Add some feature to the UI that makes it a better user interface. Try to be original.
Task 5 – TA Checkpoint
Checkpoint
When ready, write your name and workstation number on the whiteboard and the TA will meet with you as soon as he or she can. Be ready to answer TA questions about the modifications you have made or other details in the modified demo program.
Task 6 – Zip and Upload the Modified Project
After the TA has "checked off" your modified project, create a single zip file of the entire project and upload it on eClass for Lab 5. Follow the procedure given in Lab #1, Task 7. Of course, for this lab, you are uploading "4443 lab5" and you are uploadingDemo_Camera_99999.zipwhere99999is the last five (5) digits of your student number.
NOTE: To receive a grade for a lab, you must upload the zip file and demo your work to the TA (and get "checked off"). The demo must be done during the scheduled lab period.
--- End of Exercise ---