EECS2030 Lab 02
Due before Fri Oct 4 before 11:59PM
Introduction
Students are asked to accomplish several tasks in this lab:
- implement a simple class including Javadoc documentation
- complete the implementation of the
compareTomethod in several classes - complete the implementation of the
equalsmethod in several classes - use an array as a field in a class
You may, and are encouraged to, work in groups of up to 3 students from the same course section.
Getting started
- Start eclipse.
- Download this project file.
- Import the eclipse project by doing the following:
- Under the File menu choose Import...
- Under General choose Existing Projects into Workspace and press Next
- Click the Select archive file radio button, and click the Browse... button. You may have to wait about 10 seconds before the file browser appears.
- In the file browser that appears, navigate to your home directory.
- Select the file lab2_project.zip and click OK
- Click Finish.
- All of the files you need for this test should now appear in eclipse.
Implement a simple class including Javadoc documentation
Implement the Nickel class. Include Javadoc comments for the class, public fields, constructors, and methods of the class.
The constructor of the class has a precondition. Use the
custom Javadoc tag @pre. (there should be a
period at the end of the tag) to document the precondition.
The goal is to exactly reproduce the documentation found here. Recall that you have many examples of doc comments in the Java files provided to you in Labs 0 and 1.
Note that in the documentation for the compareTo
method, there is a section titled Specified by;
Javadoc automatically inserts this section because your
class should implement the Comparable interface.
You should not attempt to insert this section manually.
You can run the Javadoc tool on your Nickel.java
file using the following steps:
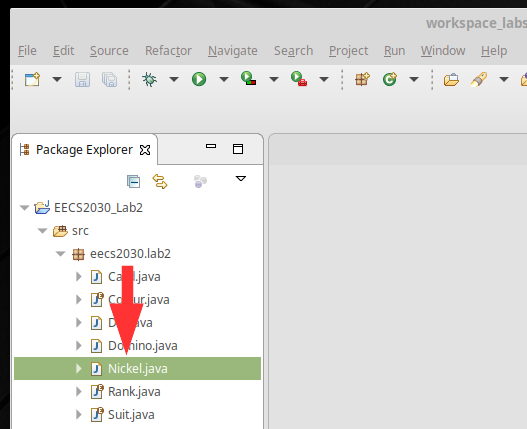
1. Select the Nickel.java file in the Package Explorer
panel:
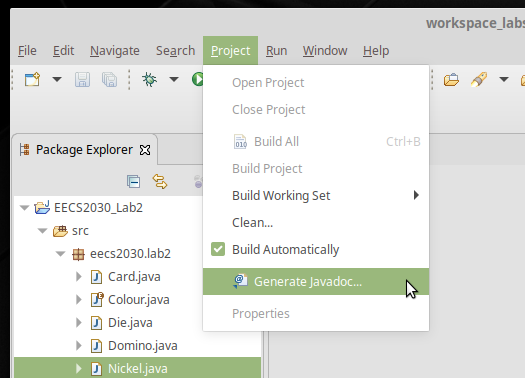
2. Under the Project menu choose Generate Javadoc...:
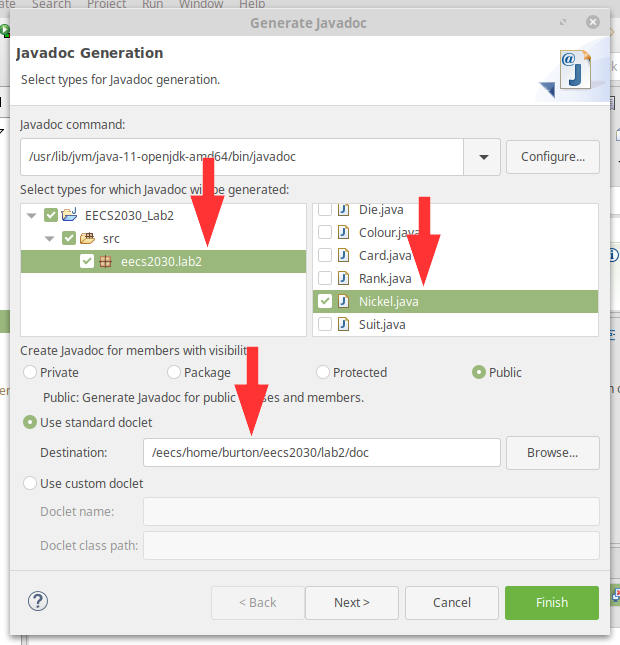
3. In the dialog window that opens, expand the project tree until you
see the eecs2030.lab2 folder. Make sure that Nickel.java
is the only selected file (otherwise Javadoc will try to generate the
documentation for all of your project files).
In the Destination textbox, choose a directory where your documentation
will be saved to. The default destination is fine. Make note of the directory
location if you want to review the generated documentation.
Click Next.
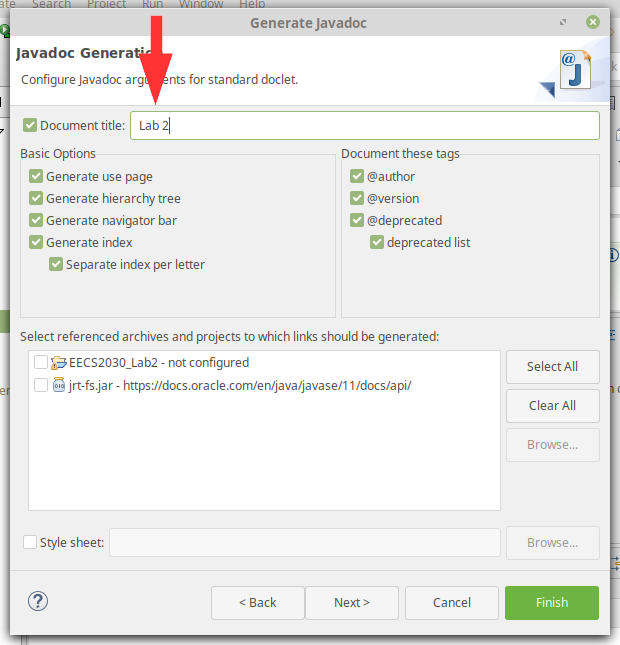
4. In the Document title textbox, enter the title Lab 2
and click Next.
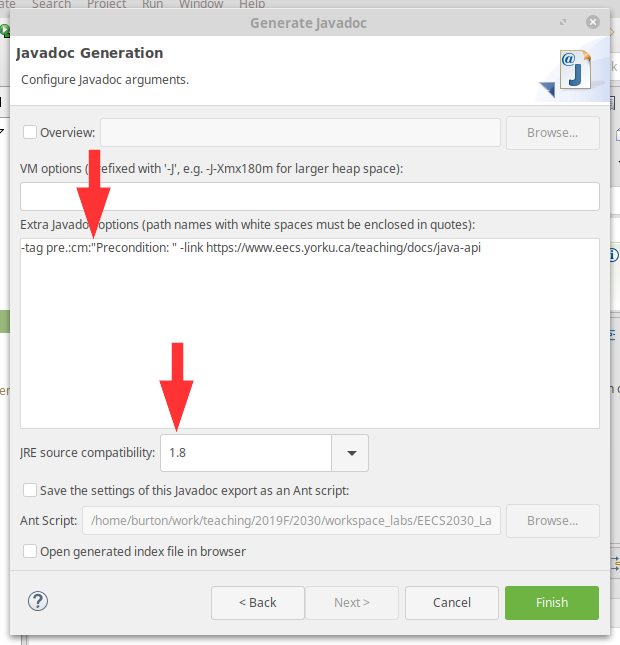
5. In the Extra Javadoc options textbox enter the following
text (you should cut-and-paste the following text to make sure that
all of the spaces are entered correctly):
-tag pre.:cm:"Precondition: " -link https://www.eecs.yorku.ca/teaching/docs/java-api
The -tag option tells Javadoc how to format the documentation
for the custom tag pre.. The cm means that the tag
may appear in constructors in methods. The string Precondition:
is the text that appears before the documentation for the tag.
The -link option tells Javadoc where to find the Java library
documentation; this allows Javadoc to generate links in your documentation
that point to pages in the Java library documentation. For example, if your
documented class uses the String class then Javadoc will generate
a link to the String documentation where needed.
Make sure that the JRE source compatibility is set to 1.8;
the EECS Java documentation given in the -link option
is for Java 8. Using a higher Java version will cause Javadoc to
report an error.
6. To view your generated documentation, use your web browser to open
the file index.html in your documentation directory. If you
are working in the Prism labs, you can open a file in Firefox by using
the keyboard shortcut Ctrl + o.
Complete the Card class
Complete the implementation of the
Card class.
Note that the Card class uses three
enumerations (which we have not yet covered in the
lectures). An enumeration is simply a special type of
class. For the purposes of this lab, you only need to
know that this.rank is a reference to a
Rank object and this.suit
is a reference to a Suit object.
Please refer to the lab documentation
for details on the Rank and Suit
classes.
The two methods that you need to complete are
compareTo and equals.
You do not need to include Javadoc comments.
Complete the Die class
Complete the implementation of the
Die class.
Note that the Die class uses an array
to represent the faces of a die. Please refer to the
offical Java
array tutorial if you require a reminder on how
to use arrays.
You need to complete the no-argument constructor
and the two methods
compareTo and equals.
You do not need to include Javadoc comments.
Complete the Domino class
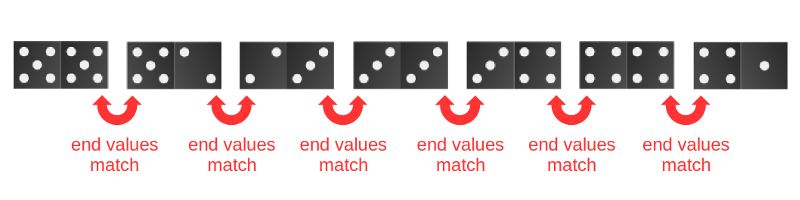
A domino tile is a playing piece used in a family of games
called dominoes. The face of a domino tile is split into two sides with
each side marked with a value between 0 and some upper value (often 6).
Although there are many variations of domino-based games, a common
theme is that players try to build lines of domino tiles by placing
tiles end to end so that the values on the ends of adjacent tiles
match.
A common set of domino tiles is called the double-six set. The double-six
set is made up of 28 tiles with no tiles repeated representing all
combinations of pairs of values. The double-six tiles are shown below:
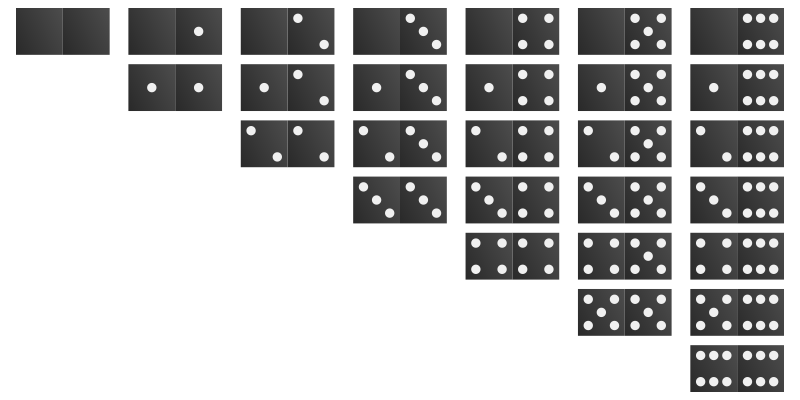
In the image above, the dominoes are sorted from smallest to largest moving left to right and top to bottom. The zero-zero domino is the smallest tile and the six-six domino is the largest tile. Every tile in a row above another row is smaller than every tile in the row below it (e.g., the zero-six domino is smaller than the one-one domino).
Complete the implementation of the Domino class.
You need to complete the methods
getSmallerValue, getLargerValue,
compareTo, and equals.
You do not need to include Javadoc comments.
Submit for students NOT working in a group
If you are
not working in a group, submit your solution using the
submit command. Remember that you first need to find your workspace directory,
then you need to find your project directory. In your project directory,
your files will be located in the directory
src/eecs2030/lab2
submit 2030 lab2 Nickel.java Card.java Die.java Domino.java
Submit for students working in a group
Students working in a group should submit only one submission for the entire
group.
If you are working in a group, create a plain text file named
group.txt. You can do this in eclipse using the menu
File -> New -> File. Type your login names into the file with each
login name on its own line. For example, if the students with login names
rey,
finn, and
dameronp, worked in a group the contents of
group.txt would be:
rey
finn
dameronp
Submit your solution using the
submit command. Remember that you first need to find your workspace directory,
then you need to find your project directory. In your project directory,
your files will be located in the directory
src/eecs2030/lab2
submit 2030 lab2 Nickel.java Card.java Die.java Domino.java group.txt
Submit your work from outside the Prism lab
It is possible to submit work from outside the Prism lab, but the process is not trivial; do not attempt to do so at the last minute if the process is new to you. The process for submitting from outside of the Prism lab involves the following steps:
- transfer the files from your computer to the undergraduate EECS server red.eecs.yorku.ca
- remotely log in to your EECS account
- submit your newly transferred files in your remote login session using the instructions for submitting from within the lab
- repeat Steps 1 and 3 as required
Windows users will likely need to install additional software first. Mac users have all of the required software as part of MacOS.