Java in Windows: The Easy Way
Follow these instructions for a simplified method of setting up a Java development environment on a Windows-based computer.
Note that the documentation for the Java libraries and the TYPE libraries are not included in this installation method. They can be found online:
Download the ZIP archive
Download the ZIP archive if you have not already done so. I recommend moving the archive to your Desktop or Documents folder, but you can place it anywhere (even on a USB key).
The ZIP archive contains the JDK7, jEdit, all of the data files used by the textbook, and the TYPE library used by the textbook.
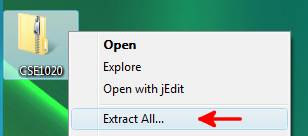
Unzip the ZIP archive
Unzip the ZIP file by right-clicking on it and selecting Extract All...
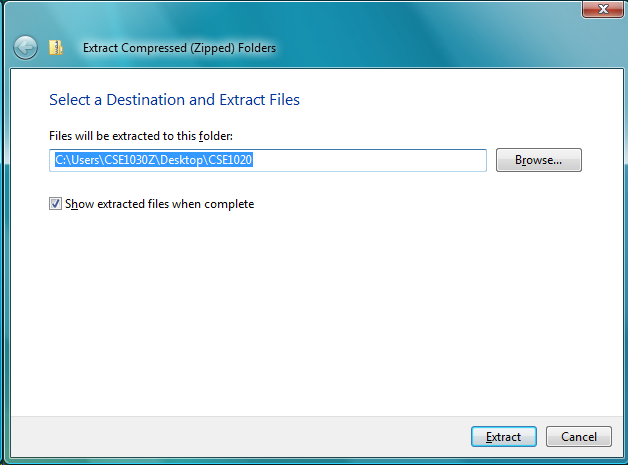
Unzip the ZIP archive
Extract the files to a new folder; you can name the folder whatever you want. You will want to see the extracted files in the next step.
There are a lot of files in the archive; this step will take a few minutes.
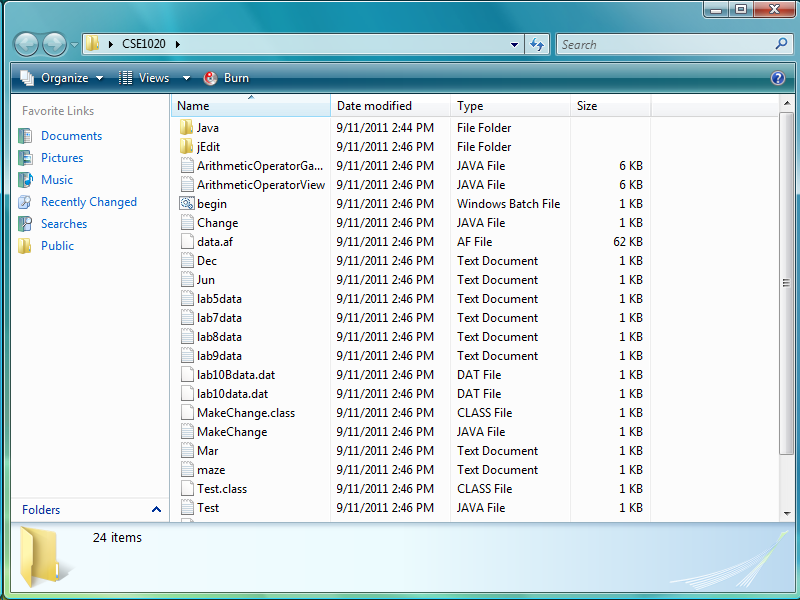
Verify the folder contents
You should see the folder contents. The files in the folder are mostly related to certain eChecks in the textbook.
The Java folder contains the JDK7, and the jEdit folder contains a working version of jEdit.
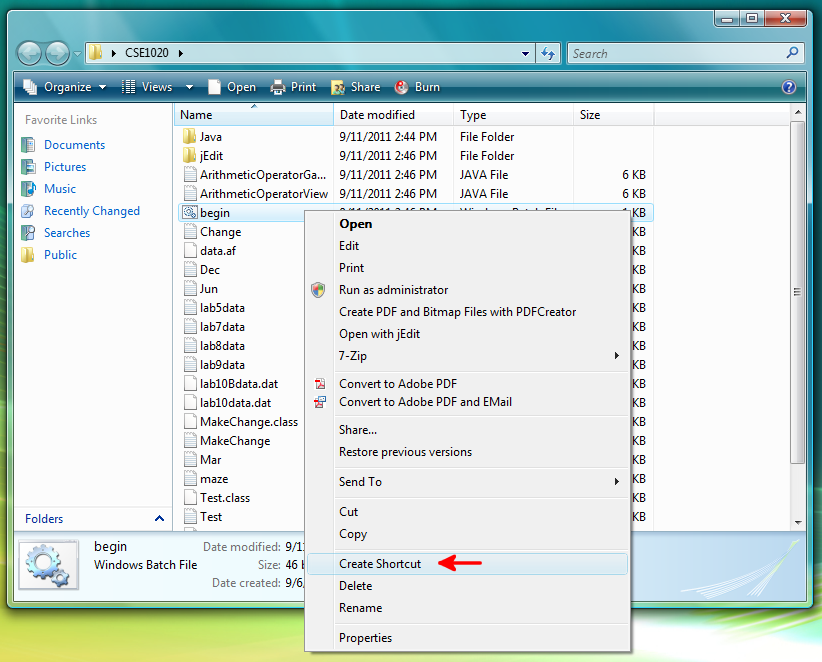
Create a shortcut
You need a command prompt for compiling and running your programs. You also need to tell Windows where the Java compiler and application launcher are located. The easiest way to do this is to create a shortcut to the included batch file begin.bat.
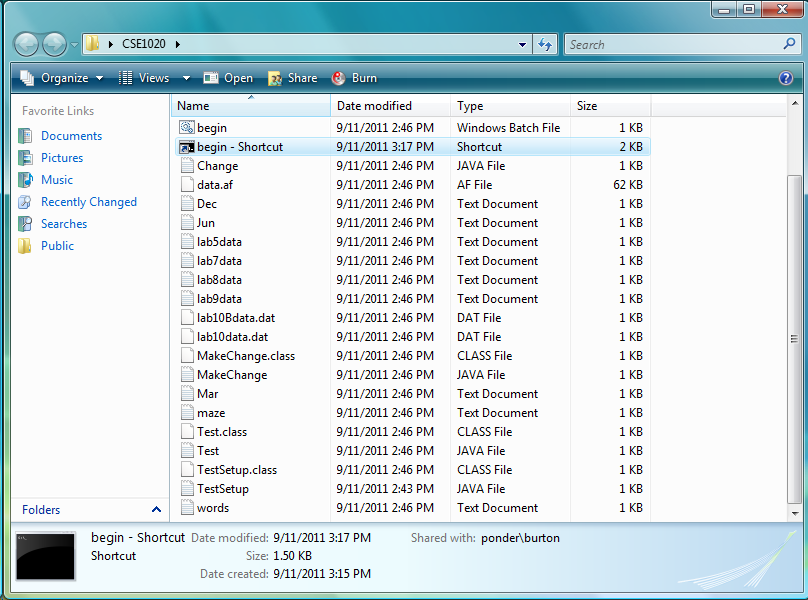
Right-click on the file named begin (or begin.bat depending on how you have the file manager configured), and select Create Shortcut
Verify the shortcut
You should see a new file named begin - Shortcut
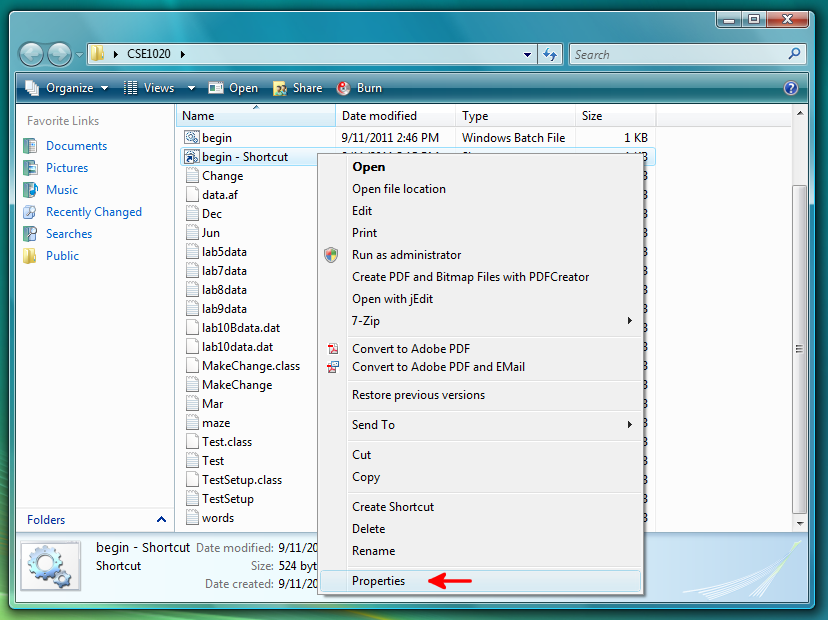
Select the shortcut properties
Right-click on the new file named begin - Shortcut and select Properties
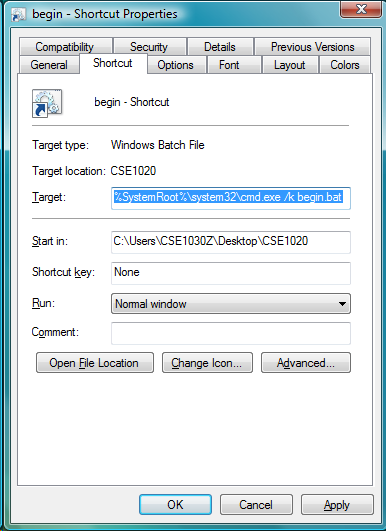
Modify the shortcut target
Modify the Target field. This field is the command that will be run when you double-click on the shortcut. You need to enter the text:
%SystemRoot%\system32\cmd.exe /k begin.bat
in the Target field and then click OK
In this case, we are using the Command Prompt program to run the batch file begin.bat. The batch file contains a few lines of code that tells Windows where to find the Java compiler, application launcher, and other tools.
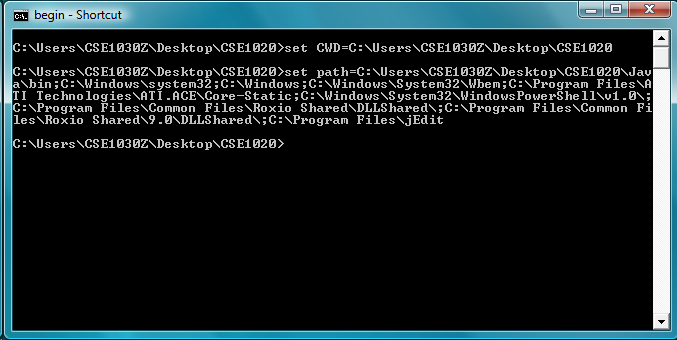
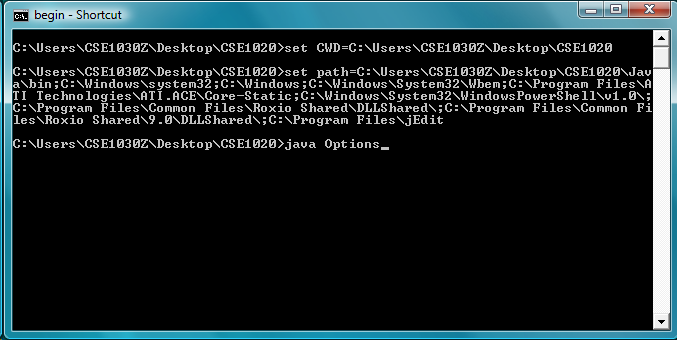
Try the shortcut
If you have done everything correctly, when you double-click on the shortcut you should see a Command Prompt window with some text. The second line of text will likely be different for each person's particular computer.
Set your eCheck options
You need to set your eCheck options if you want to submit eChecks from home. This will also confirm that Java is running correctly on your computer.
Type java Options followed by the Return key into the Command Prompt window.
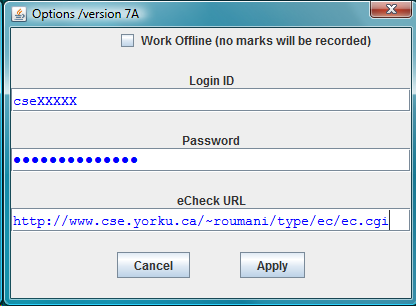
Set your eCheck options
If the eCheck Options window appears, then the installation was probably successful.
Set your eCheck options as you were shown in the Guided Tour from Lab 1. Make sure that the checkbox Work Offline is unchecked. Click Apply when you are done entering the necessary information.
Done
You should now have a working Java development environment.
- Remember to use the shortcut you created to get a Command Prompt for compiling and running your Java programs.
- A working version of jEdit is installed in the jEdit folder. Navigate to the folder and double-click the jEdit icon to start the editor.
- The TYPE API is already installed for you.
- Some of the eCheck exercises and labs in the book use data files that are located in the folder you created.