CSE 1710.03A Programming for Digital Media

Lab 03

Due date: Sep 28, 2009 at 20:00

Simple automatic exposure correction for images

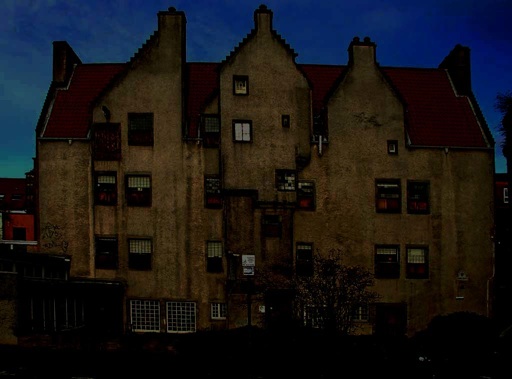
Some images are too dark. To make them brighter, one of the simplest approaches is to search for the brightest pixel in the whole image, figure out how to make this pixel have maximum brightness, and then apply this correction to every pixel in the image. Here are examples of images that are much too dark.

To finish this lab, follow the instructions below in sequence.

  1. This lab assumes you have done, and understood the instructions for lab2. If you don't know how to do certain operations, please refer to that lab!
  2. Copy and paste the Jython code below into a new JES window.
    # Scale all colors by a constant (currently fixed to 0.5, which makes the picture "half bright")
    def scaleImage(picture):
      scaleFactor = 0.5
      for p in getPixels(picture):
        valueRed   = getRed(p)
        valueGreen = getGreen(p)
        valueBlue  = getBlue(p)
        setRed(p,  valueRed   * scaleFactor)
        setGreen(p,valueGreen * scaleFactor)
        setBlue(p, valueBlue  * scaleFactor)
    
  3. Before you proceed, add comment lines at the beginning of the code with your name, the date, and your student number (as in lab02).
  4. Now you save this file as lab03.py, and load it. Try it on an image, e.g. by using the following commands
    >>> filename = pickAFile()
    >>> pic = makePicture(filename)
    >>> scaleImage(pic)
    >>> show(pic)
    
  5. If you want to save the result (you don't have to), you can use something you learned in lab02.
    >>> writePictureTo(pic,r"Z:\lab3.jpg")
    
  6. To solve the assignment, you have to modify the above function. First, rename the function to autoExpose(picture)
  7. Then, add a loop at the very beginning of the function, that searches for the brightest pixel. For this, you will need to use the max() function, which returns the maximum of all it's arguments. To find the maximum of two values, you can use newmax = max(value1, value2). More precisely, you have to find the value for the brightest color of the brightest pixel. That means, you need to iterate over all pixels of the image, and compute for each pixel the brightest color. Then compute the maximum of the brightest color found so far and the current pixel and store that as the brightest color found so far.
  8. Hint: you will need to create a new variable that stores the brightest color found so far. What value should you set that variable to at the beginning, i.e. before the loop? Consider what happens when the picture is very dark (almost black) or very bright (almost white).
  9. Optional shortcut: the max() function can take more than 2 arguments. In this lab you may consider using 4 arguments, 3 of which will be the colors of the current pixel.
  10. Once you have found the brightest value, you can compute a scale factor that will make that color maximum brightness. Pixel values can vary between 0 and 255. Given that you will multiply pixels to scale them later, consider using a division to find that factor.
    As colors are expressed as integer values, but the scale factor is usually a rational number (meaning a number with digits after the decimal point, in computer terms a floating point number), you may have to use a statement of the form scaleFactor = float(value1) / float(value2). Technically speaking, the second call to float() is redundant in the above statement, but it doesn't hurt, either. If you are using constants, another way to achieve the same effect is to write the number with .0 at the end (as in 12.0).
  11. Finally, adapt the remainder of the function, i.e the code shown above, to scale the image with that factor you found. Hint: you only need to modify a single line here, and that line is not inside the loop body.
  12. Comment your code. You do not need to comment every line, but every significant block of functionality should have a comment
  13. Make sure to test lab03.py one last time, before you proceed to the next step. You can test your lab by executing the above mentioned sequence of steps on the command line as often as necessary. Note that you do not need to call "pickAFile()" more than once in that process, unless you want to test your program with different images. You may have to repeat the call to makePicture() as the function you wrote modifies the image.

How to submit the lab

Exactly like in lab02, you hand in this lab the submit command on the Linux systems that are behind the PRISM lab infrastructure. For details on how to submit, please refer to lab02. However, this time please submit to lab03, i.e. issue the command
    submit 1710 lab03 lab03.py
Note: You must do all the above steps correctly for receiving full credit for this lab.